Windows Update:
Windows update is a feature allows windows operating system to download important system updates from Microsoft. Windows updates of your client computer retrieves new updates from the Microsoft Update server through internet. This is known as Windows server Update Service
Windows Update is tool used to manage software updates on your computer running on windows 10. Windows update features allows the users to download important system updates form Microsoft. A user who has Administrator privileges or Administrator can check for new software updates, install new updates, modify the updates, review the updates that are already installed and review the hidden updates through Control Panel.
➤Configure or view the Update:
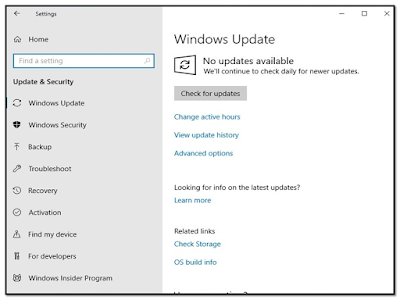
To configure or view the Windows Update, click Start → Settings → update & Security.


➤Uninstall the Windows Update:
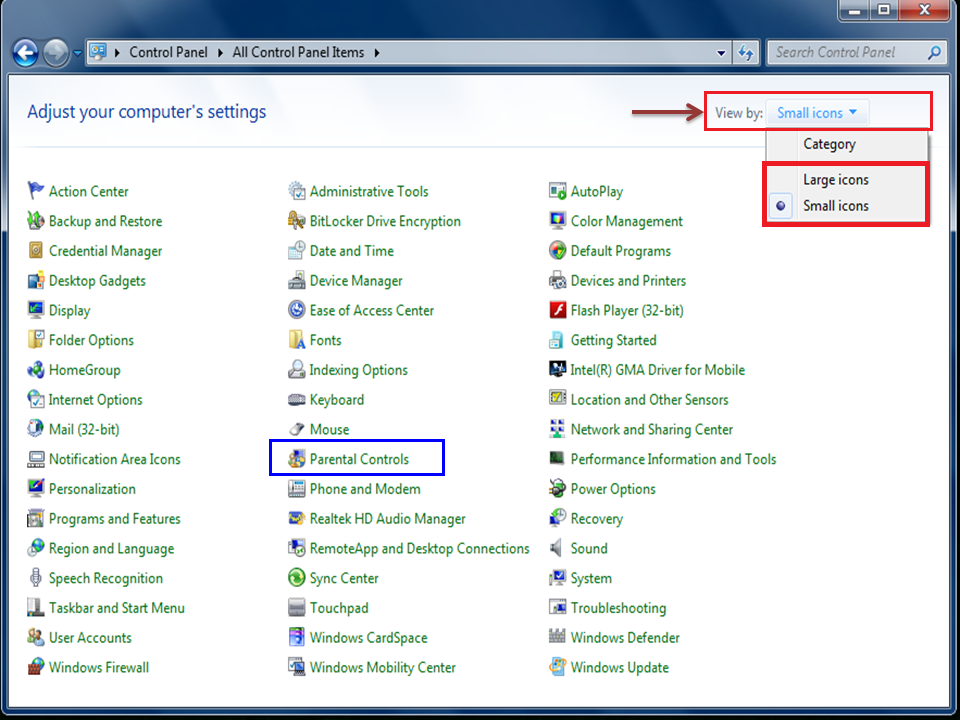
1) Click Start → Control Panel → Programs and Features.
[If "ClassicShell' installed in your 'Windows 10' PC]


To configure or view the Windows Update, click Start → Settings → update & Security.

↓

↓

Or
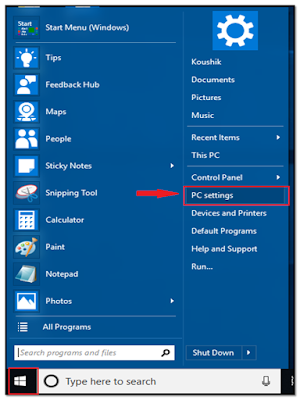
If you use "ClassicShell" [Used to make 'Windows 10' Start Menu look like 'Windows 7' Start Menu] then, Start → PC settings → Update & Security.
↓

➤Uninstall the Windows Update:
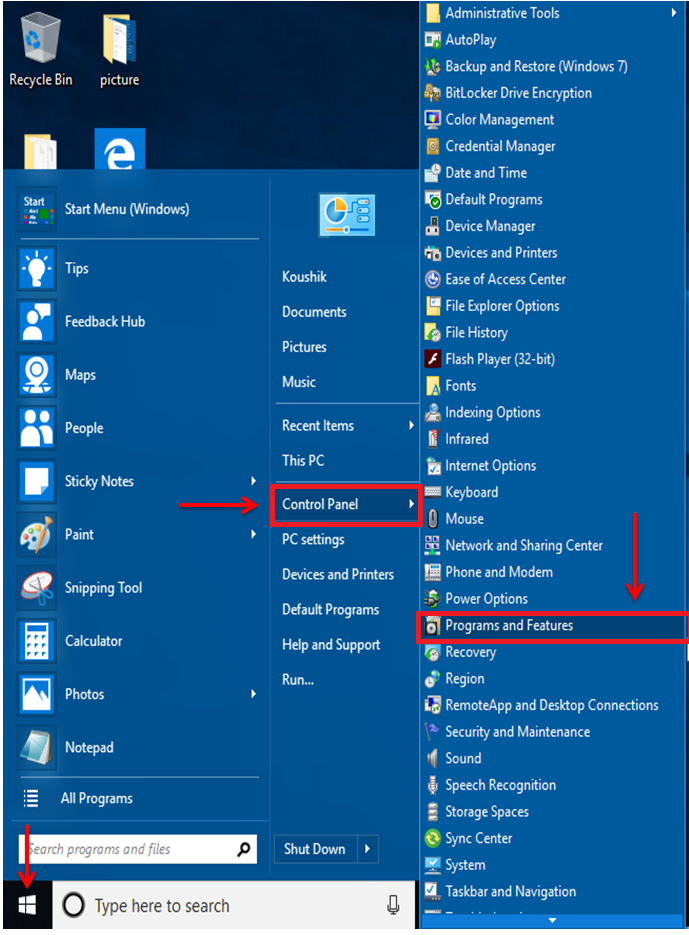
1) Click Start → Control Panel → Programs and Features.
[If "ClassicShell' installed in your 'Windows 10' PC]
Or
Click Start → Windows System → Control Panel → Programs [View by: Category] → Programs and Features.
↓

↓

2) Then 'Program and Features' window will come. → Click at 'View installed updates'


3) here you will see the all intalled update Windows files. → Right click on 'Windows update file' [Which you want to uninstall] → Click 'Uninstall'


➤To stop Windows Update permanently:
1) Press 'Windows' + 'R' key from keyboard → The 'Run' command window will come → Write down the 'services.msc' in the 'Run' command box → Then click 'OK' button.

Then 'Services' window will come → Select the 'Window Update'.


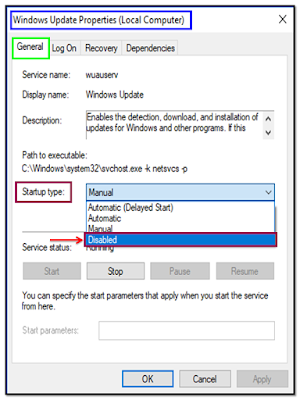
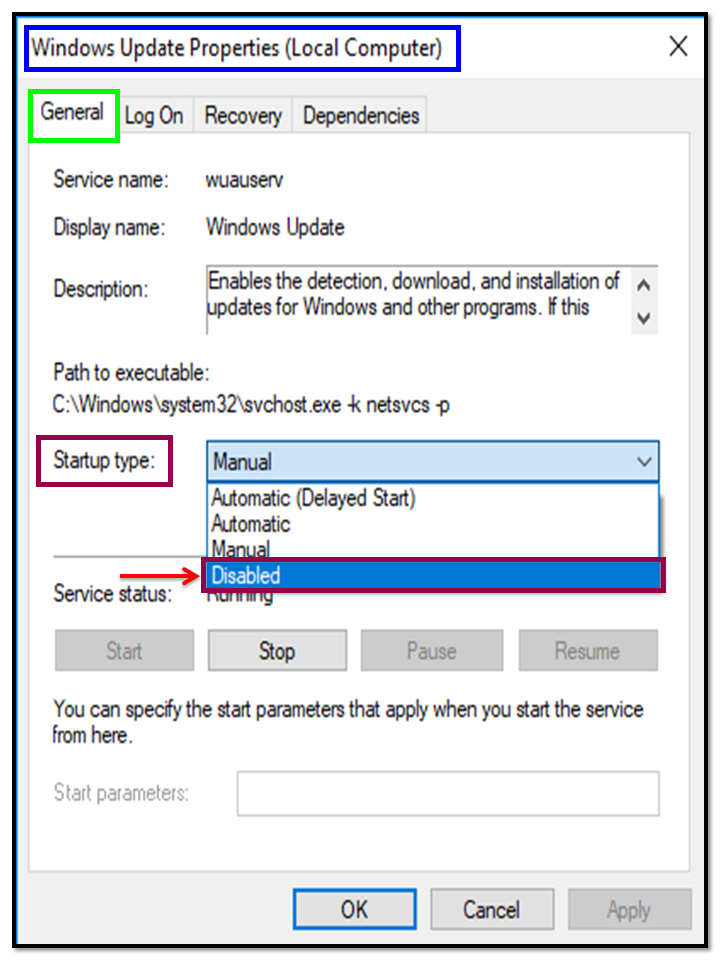
Double click on 'Windows Update' → 'Windows Update Properties' will come → Select 'General' tab → At 'Startup type:' select 'Disabled' → click 'Apply' → Then click 'OK' button → Close the 'Services' window.
↓

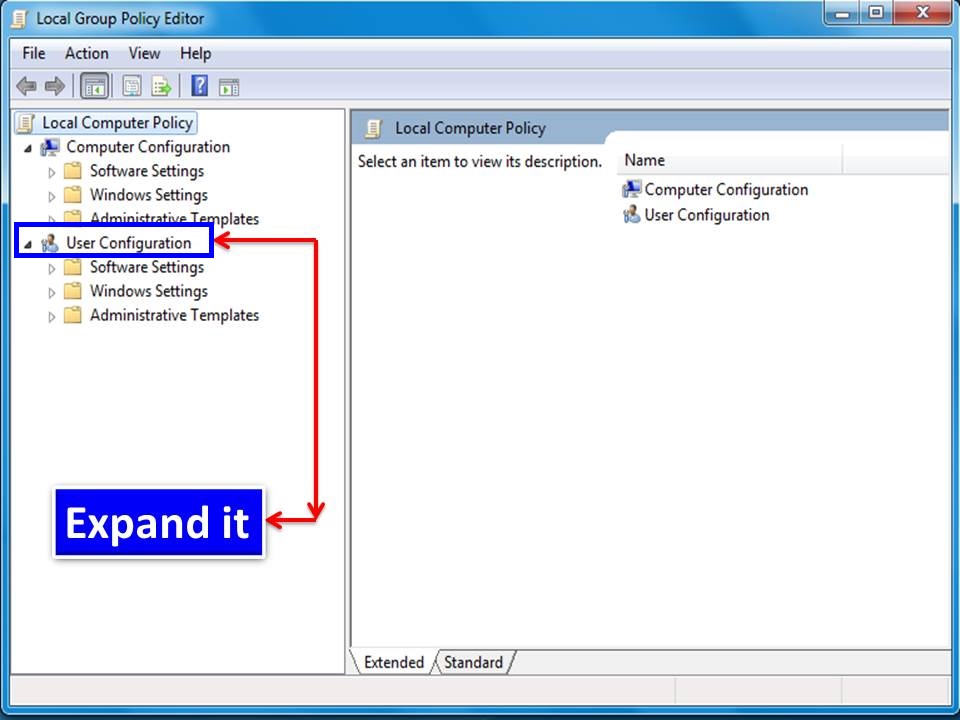
2) Again press 'Windows' + 'R' key from keyboard → The 'Run' command window will come → Write down the 'gpedit.msc' in the 'Run' command box → Then click 'OK' button.


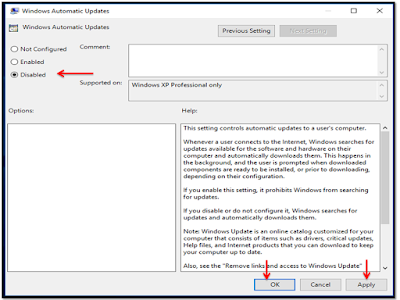
Then 'Local Group Policy Editor' window will come → Select or expand 'User Configuration' → Expand 'Administrative Templates' → Click at 'All Settings' → Select 'Windows Automatic Updates' from right pane.

Then double click on 'Windows Automatic Updates' → 'Windows Automatic Update' window will come → Select 'Disabled' → Click 'Apply' → Click 'OK' button.

3) Then click at 'System' folder → Select 'Windows automatic Updates' from the right pane.

Then double click on 'Windows Automatic Updates' → 'Windows Automatic Update' window will come → Select 'Disabled' → Click 'Apply' → Click 'OK' button.
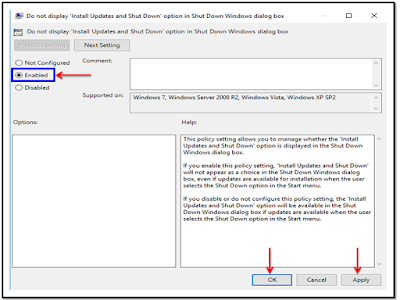
3) Then select 'Windows Components' folder → Select 'Windows Update' folder from the right pane.

Double click on 'Windows Update' folder → Double click on "Do not display 'Install Updates and Shut Down' option in sh..."

Then select 'Enable' option → Click at 'Apply' → Click 'OK' button.
Again double click on " Do not adjust default option to 'Install Updates and Shut Do..."

Then select 'Enable' option → Click at 'Apply' → Click 'OK' button.

Now close the 'Local Group Policy Editor' window.

Then double click on 'Windows Automatic Updates' → 'Windows Automatic Update' window will come → Select 'Disabled' → Click 'Apply' → Click 'OK' button.

3) Then click at 'System' folder → Select 'Windows automatic Updates' from the right pane.

Then double click on 'Windows Automatic Updates' → 'Windows Automatic Update' window will come → Select 'Disabled' → Click 'Apply' → Click 'OK' button.

3) Then select 'Windows Components' folder → Select 'Windows Update' folder from the right pane.

Double click on 'Windows Update' folder → Double click on "Do not display 'Install Updates and Shut Down' option in sh..."

Then select 'Enable' option → Click at 'Apply' → Click 'OK' button.

Again double click on " Do not adjust default option to 'Install Updates and Shut Do..."

Then select 'Enable' option → Click at 'Apply' → Click 'OK' button.

Now close the 'Local Group Policy Editor' window.
----------------------------------0--------------------------------